This is a brief guide to explain how you can set up your Eazyshow’s profile, schedule video chat sessions and be in a session, and how you can add a Live Help button.
For any questions and comments, please contact support@eazyshow.com
Table of content:
I. Definitions
II. Eazyshow’s Backend
This is where you log in. When you log In, you get to the Eazyshow’s dashboard. On the left side there are tabs that take you to various areas in the backend. You will find management and monitoring tools, and important statistical data there that will help you manage your activities. You take calls when you are in the dashboard.
III. The Session
Once an agent answers a call from the dashboard, the session starts. Once the session is initiated, there are several tools related to the online meetings, which can help enrich the interaction.
IV. Live Help
Live Help can be embedded into business flows and allows clients to initiate a session from any place (page-in widget, iframe, link or ad, etc.)
I. Definitions:
- Client – You, a customer of Eazyshow who registered to use the service
- Customer – Your customer, the one you wish to communicate with
- Agent / Users / representative – that you or your person who host the session
- Back-end – This is Eazyshow backend that includes the dashboard where everything is managed and run
- Session – the room where you meet and talk with your customer
II. Eazyshow’s Backend:
Getting started as a User:
1. To set up your account, fill in all the relevant fields and click on Save.
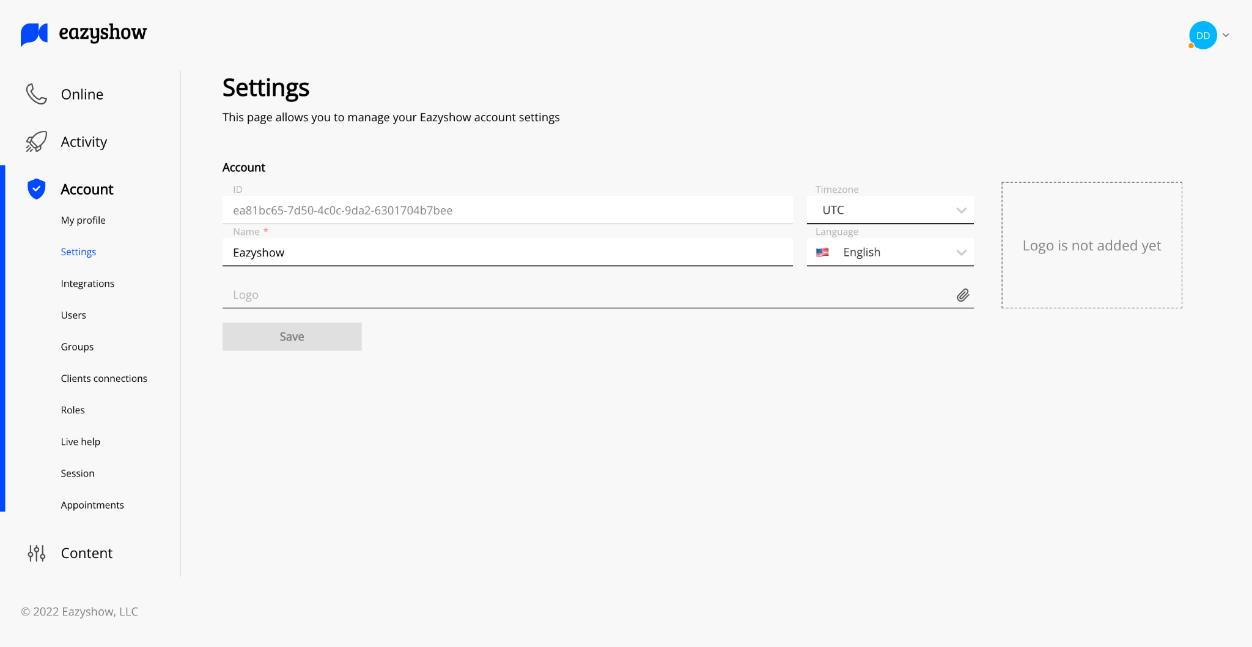
2. Check the account settings – Insert your logo and choose your time zone and preferred language.
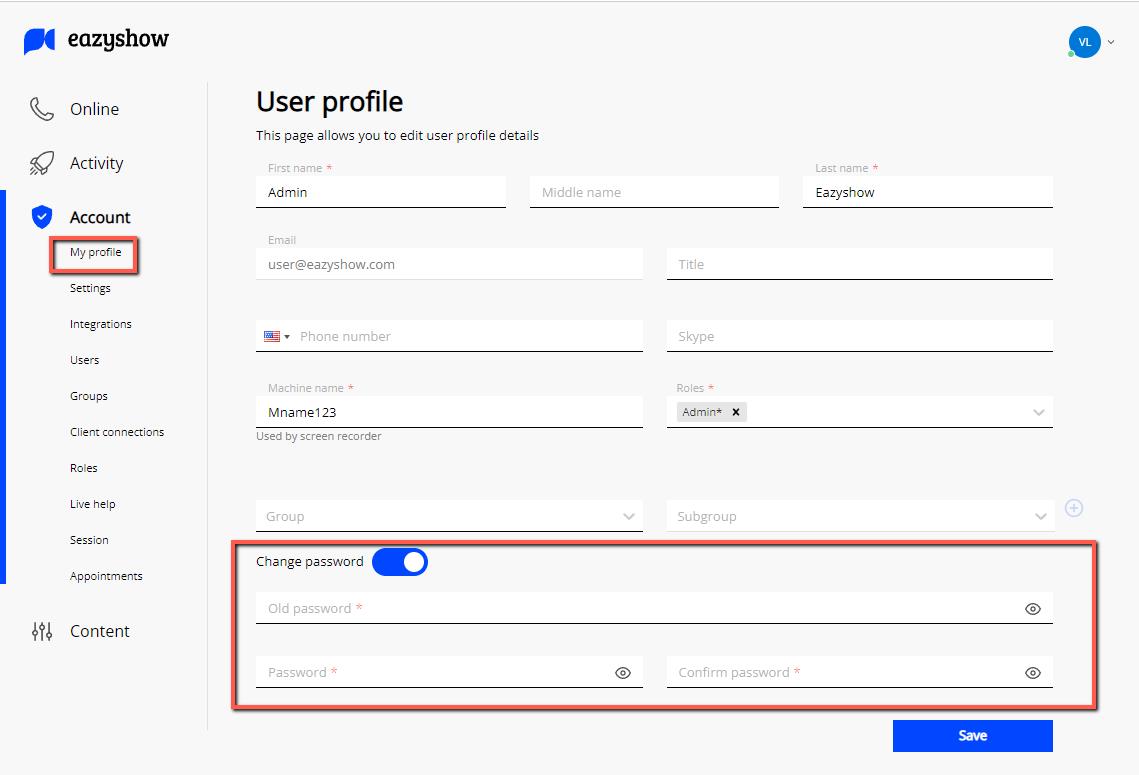
3. To change your password, click the “Change password” button at the bottom of the “My profile” page before clicking save.
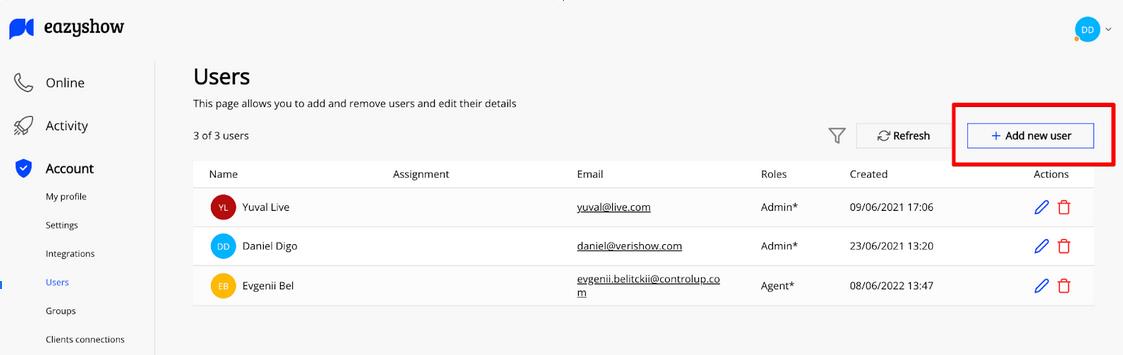
Adding New Users/Agents
You can add more users, or agents, depending on your plan. Having more users means more available help for customers, from the same Eazyshow account. Follow the steps below to invite users to use your Eazyshow account.
1. Click on Account > Users
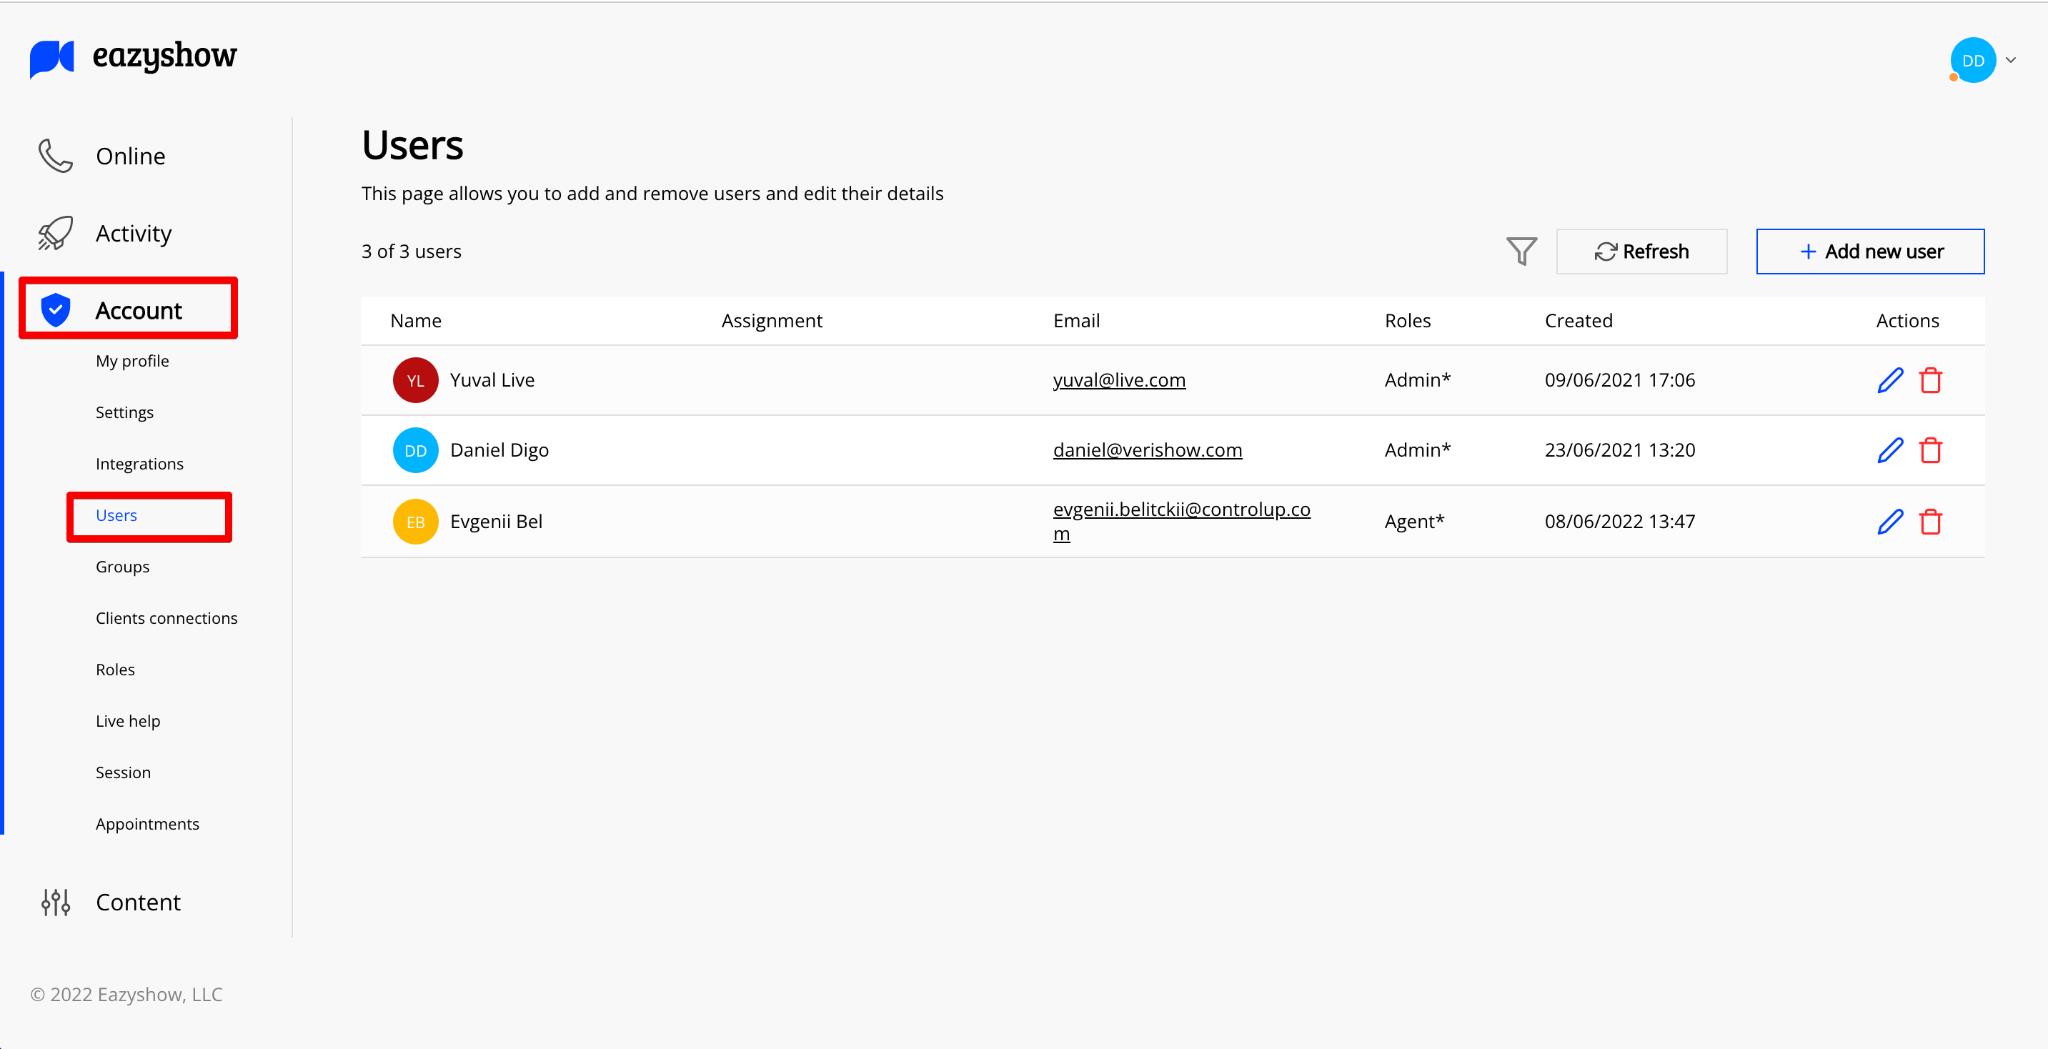
2. Click on Add new user
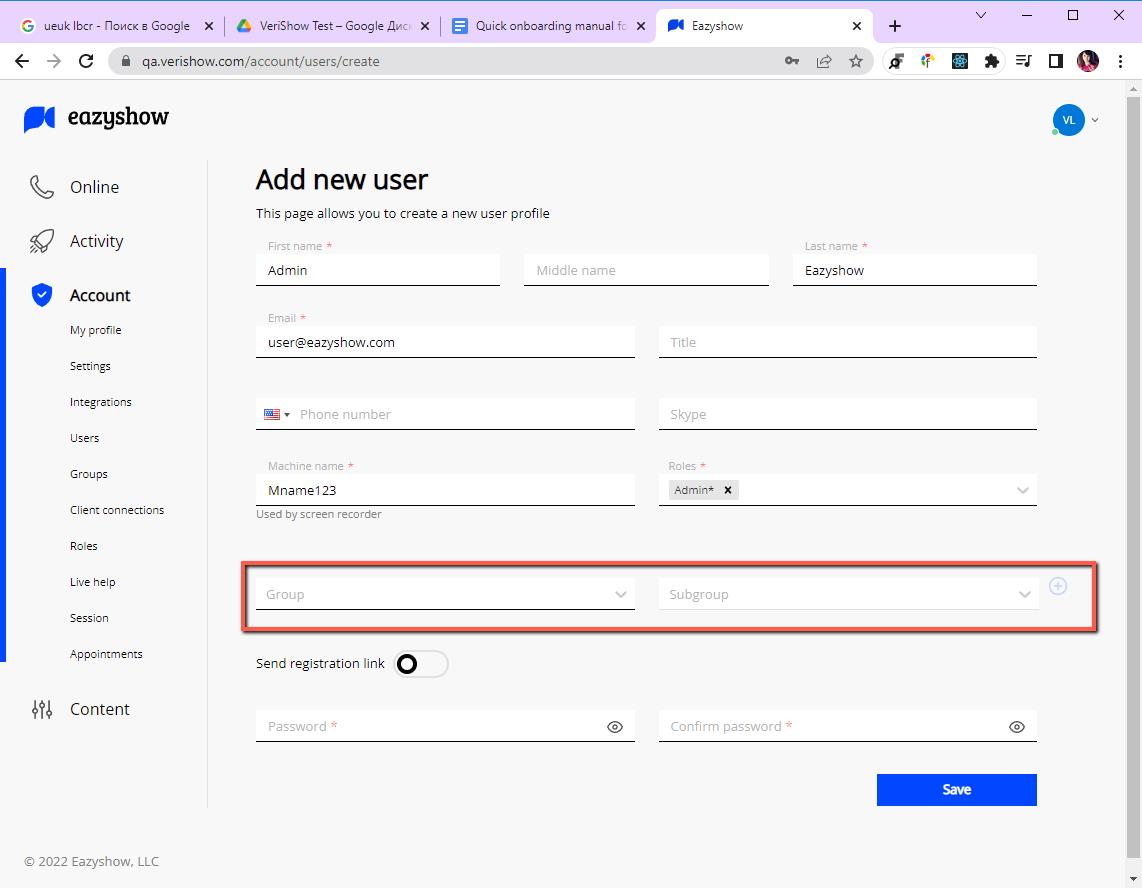
3. Please complete all required fields. Pay attention to the mandatory fields, which we require for the proper workflow.
a. Once you’ve completed the profile, you have the option of sending a registration link to your colleague to complete the registration process (the preferred option) or setting up the password for them.
b. If you’ve already set up a password for your colleague, you’ll need to share it with them for them to sign into the Eazyshow platform.
c. Click on “Save” – and you are all set! Your colleague will be able to sign into Eazyshow and take calls.
Configure groups/subgroups
If you need to separate your business activities, you can divide users into groups/subgroups.
How do you create a group? :
1. Click on Account > Groups. Here you will see the list of your groups. Inside the module, you will be able to see details of each group.
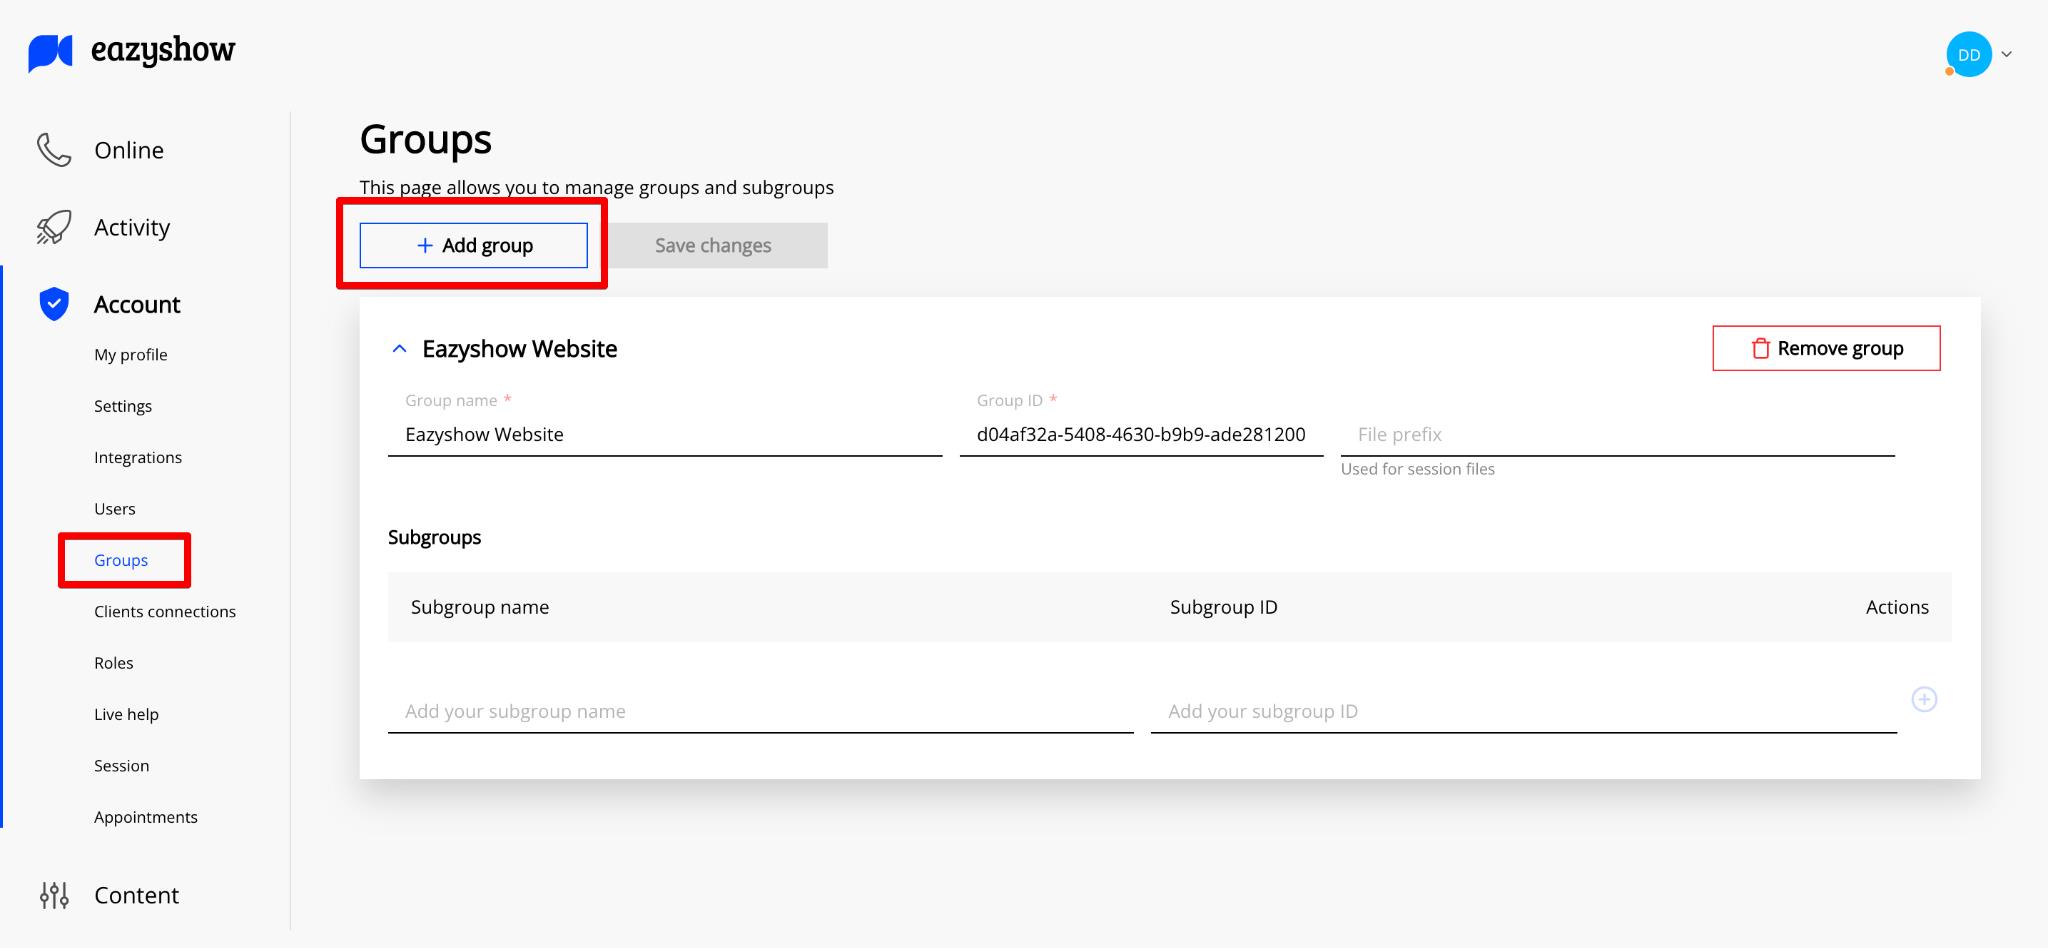
2. Click on Add group.
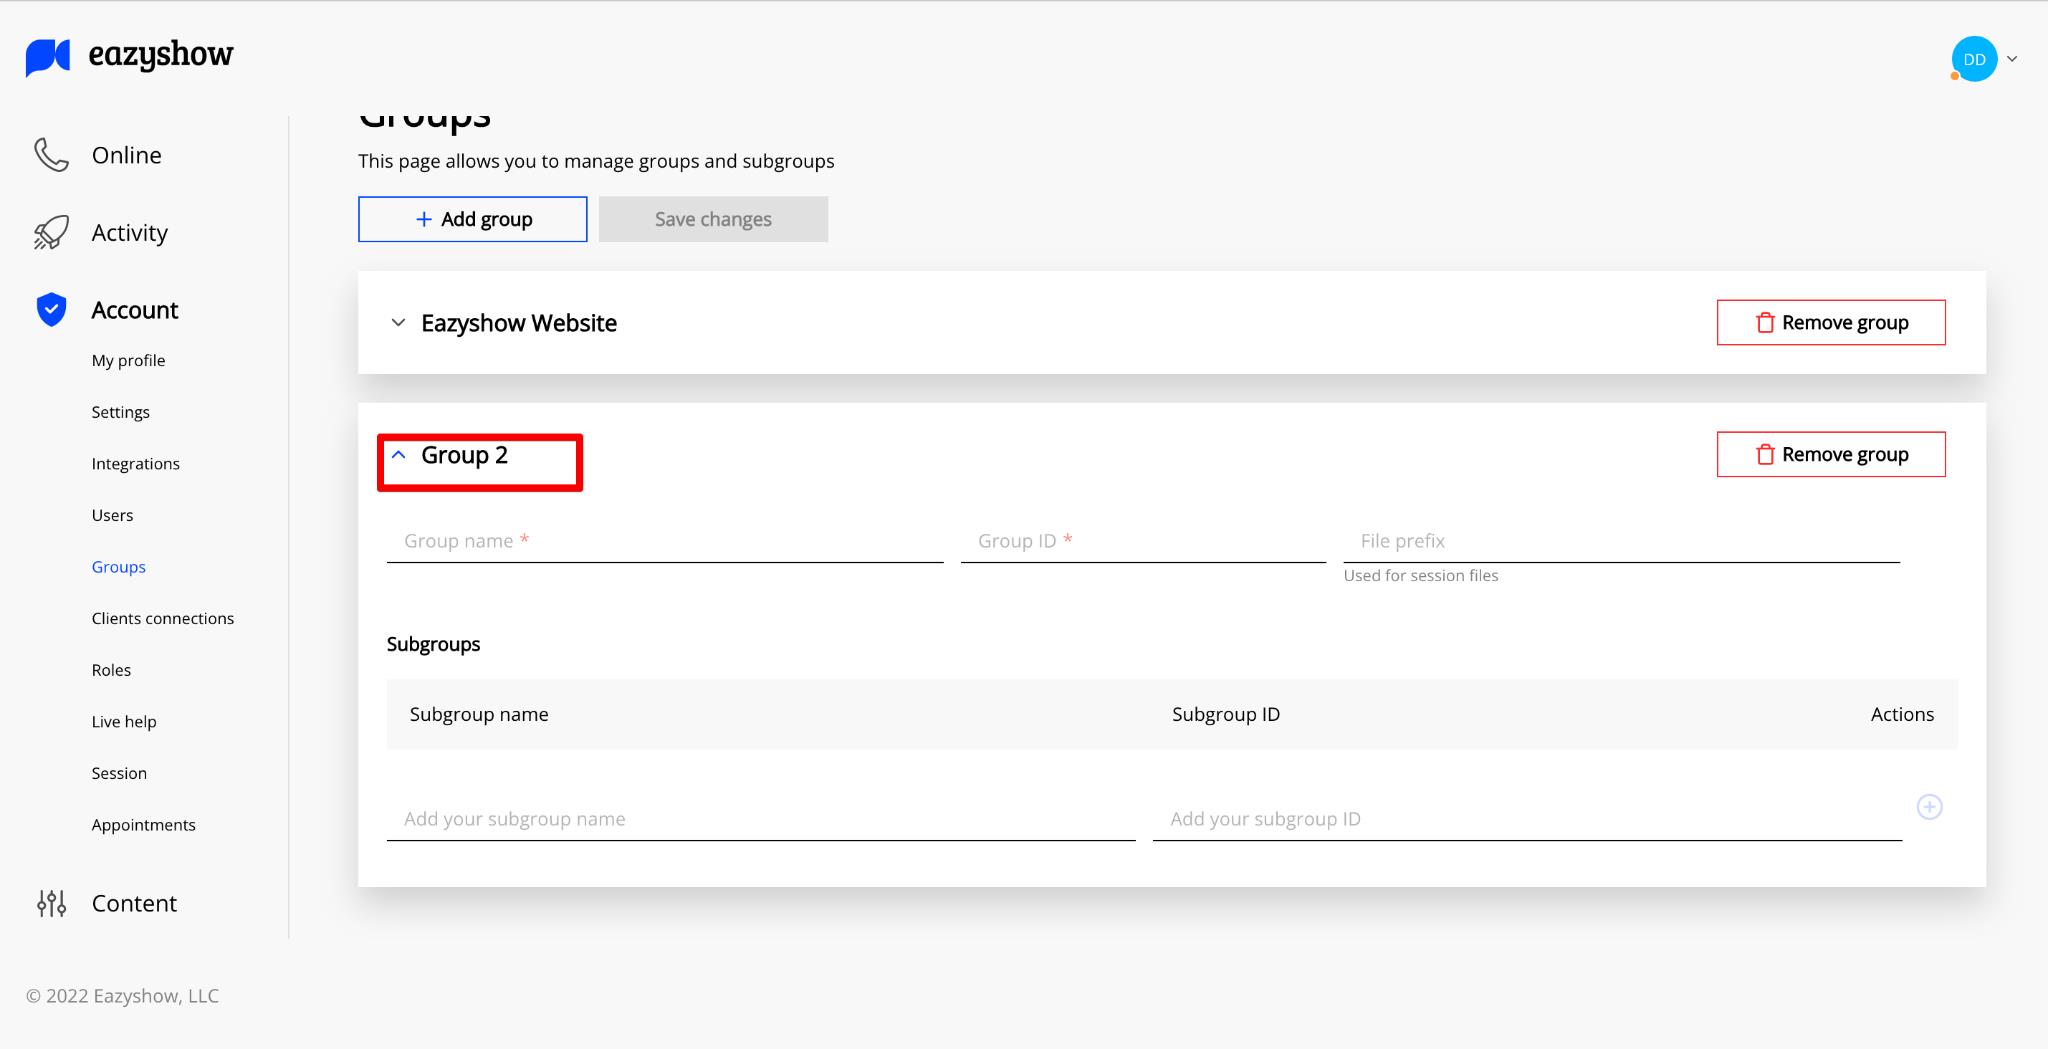
3. Fill in the mandatory fields to create new group:
a. Group name
b. Group ID
c. Add subgroup if needed
1. Enter subgroup name
2. Enter subgroup ID
d. Click save changes
III. The Session:
Once an agent answers a call in the dashboard, a session starts.
Follow the steps below to learn how to make and receive calls, and how to use the session platform
This is your dashboard where you manage your calls (the Online top tab). When you login, you get her.
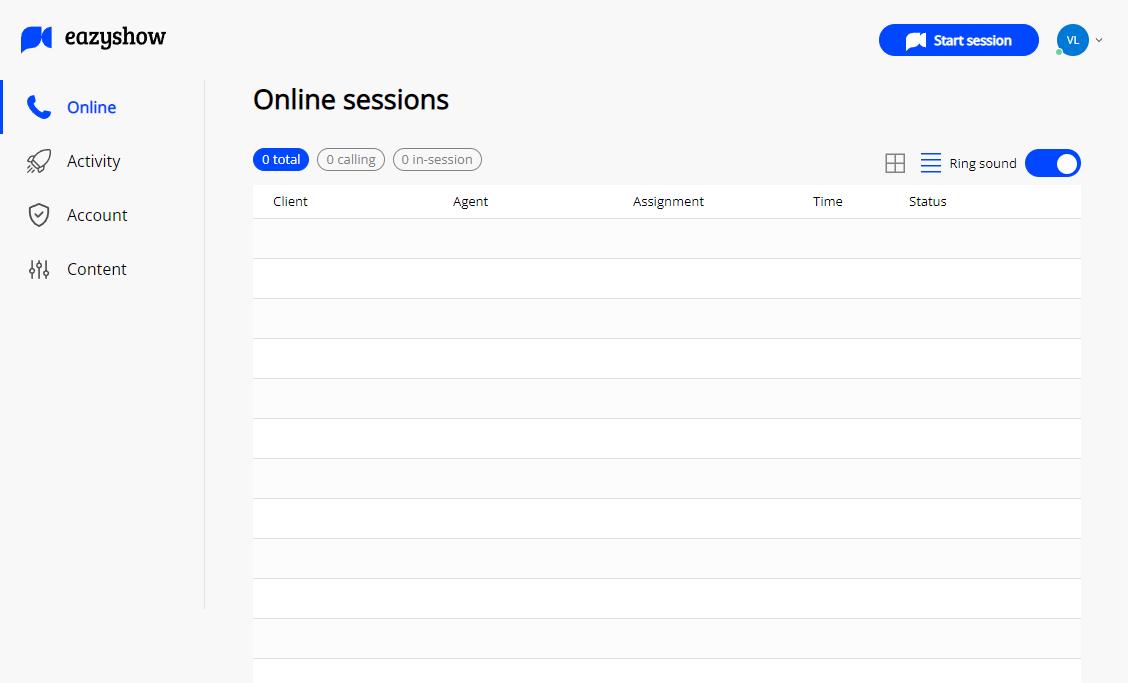
How do you take incoming calls as a User/Agent?
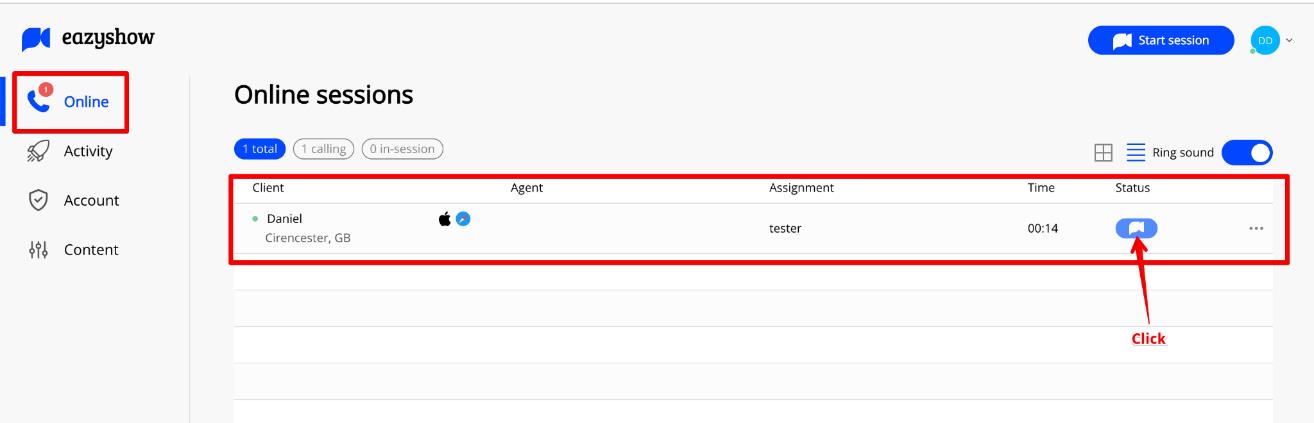
As an agent, you will be able to take incoming calls by clicking on the online tab in the dashboard.
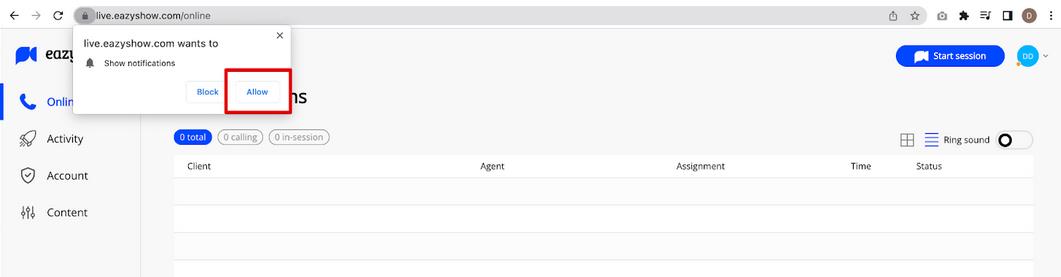
1. The online tab will show you all the sessions you have pending, including ongoing calls and calls waiting to be answered. Please allow notifications in the browser in order to use all of the features of this tab.
2. When the Total button is activated (on the left-hand side of the table), you will see all the calls including parameters.
3. The button on the right will allow you to enable or disable the ring sound.
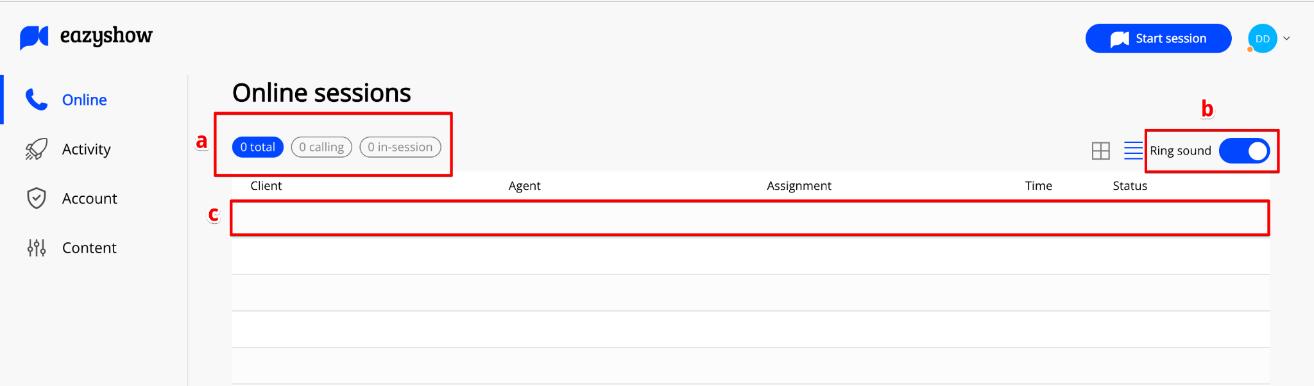
4. Once a customer has called in, you will receive an in-browser notification and the call will appear in the online tab. Click on the blue Eazyshow icon on the right to take the call.
Initiating a session with a customer
To start initiating a customer session from your end, you will need to create an invitation for a new/existing customer.
1. From the online tab, click on “start session” in the upper right-hand corner. This will initiate a client invite.

2. Invite customers by clicking on “invite client”.

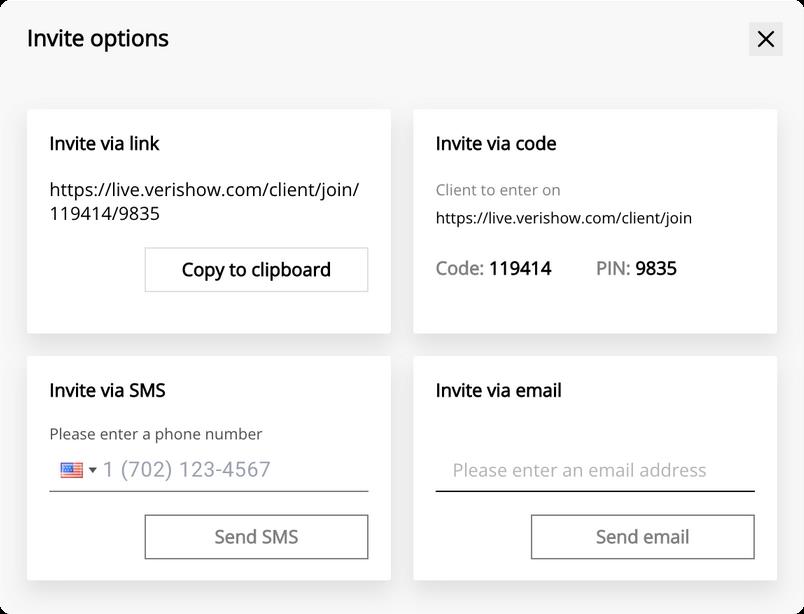
3. You have four different options for inviting customers to a session:
Invite via link – Eazyshow generates a unique link that you can copy and send to the customer.
a. Invite via link – send the link ti whoever you wish to speak with.
b. Invite via code – You will share the code and PIN with the customer, so your session will be protected.
c. Invite via SMS – You can send the customer a text that includes a link to the session and other details. This option is fully customizable, as you can edit the text to your liking. The send button will turn gray once the text is sent.
d. Invite via email – This option is fast and simple. Just enter the customer’s email and they will receive the details to join the session.
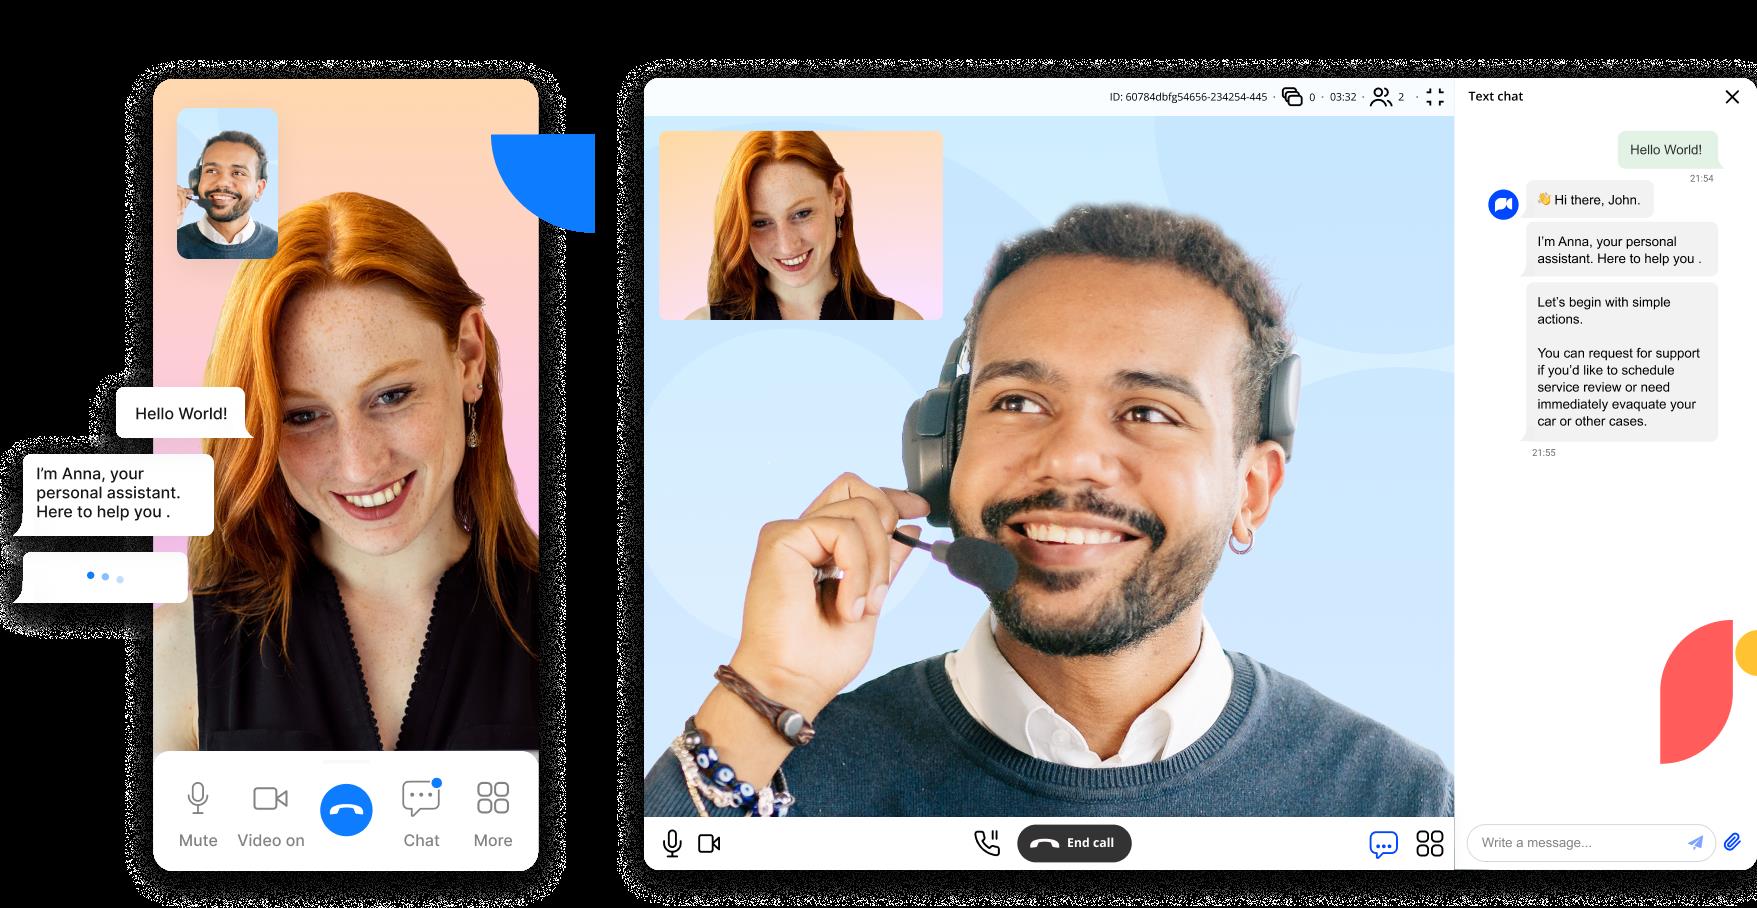
When the customer joins the session, you will see them, and they will see you.
In the session experience:
In the session you will be able to communicate with customers with the help of several enhanced features:
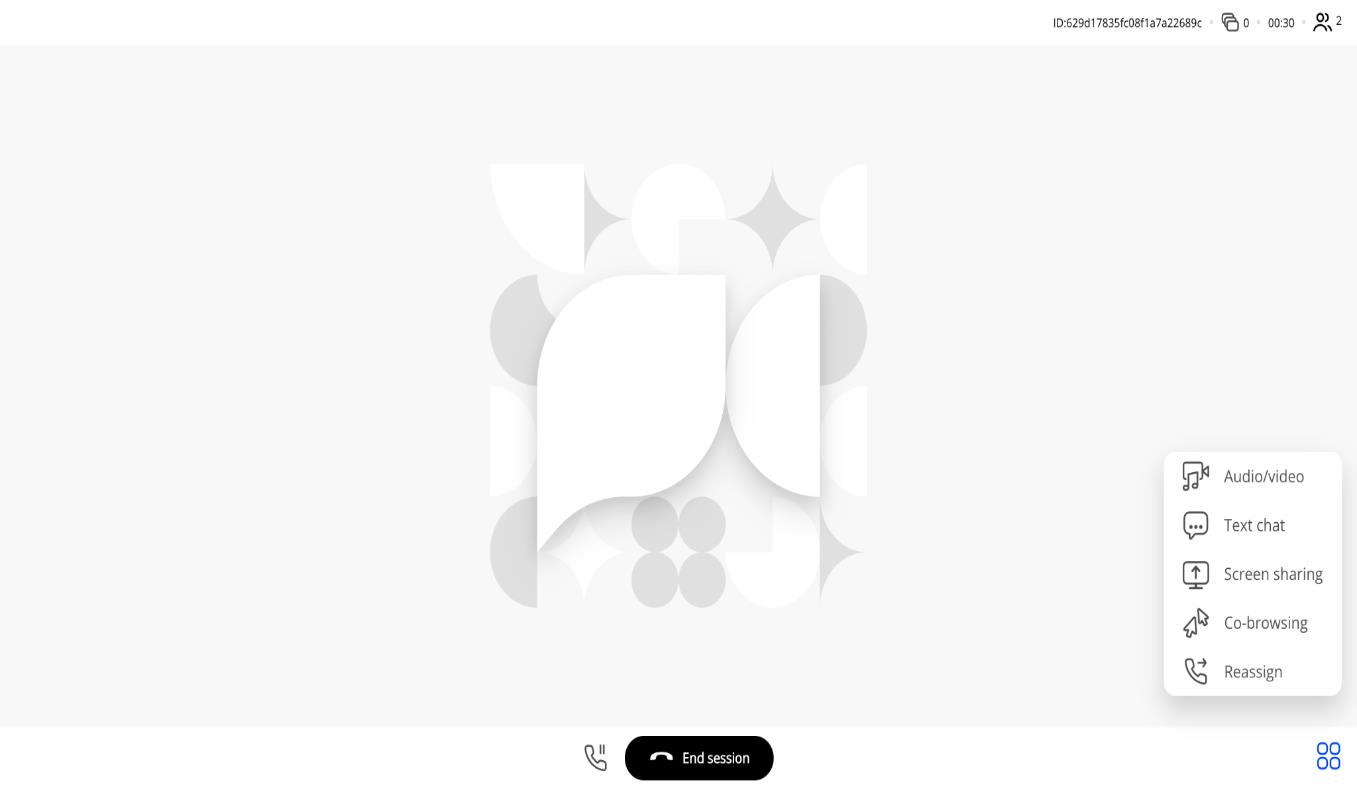
● The Start activities button is located in right bottom corner (four circles button). It allows you to:
– Start audio/video,
– To text chat (with files transfer), etc. located in right down corner.
– To screen share,
– To Co-browse,
– To reassign a call
● Make local screen or participant video screenshots during a session.
● Request client geolocation and save a geo-screenshot to ensure location requirements.
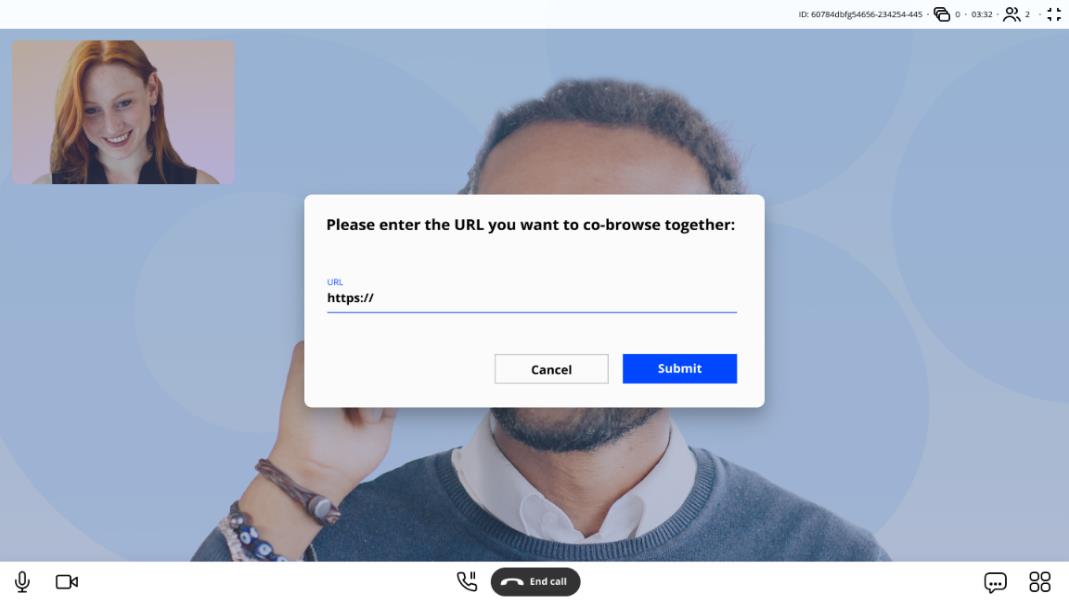
● Co-browsing / Screenshare. This allows you to both look at the same thing in real time.
In session – examples:
The following is in-session view. On the left customer view. The man speak with the lady from his mobile device. On the right screen, the agent, the lady speaks with the customer. I always see myself in the small top corner image.
In case there is a need to co-browse, agent needs to insert the site URL
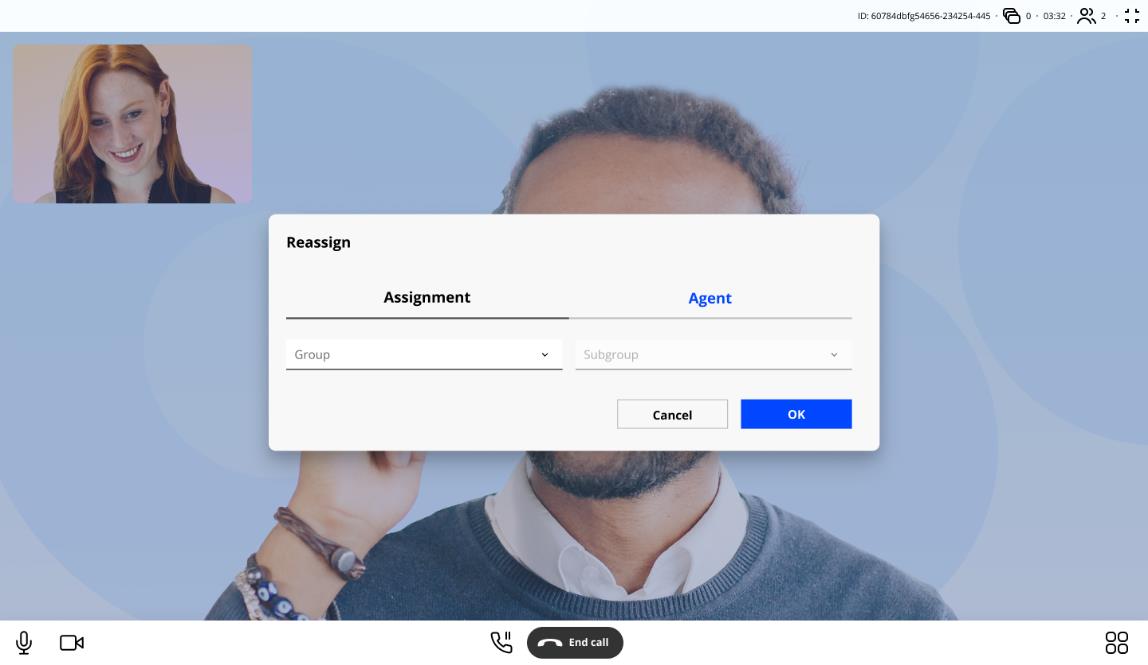
In case agent needs to transfer the session to another agent, they click on reassign and fill-in the information as in the screen.
Some other features include:
● Display network quality
● Display a screen recorder status during a session
● Join an active session (switch to another device)
After the session, you can view the rating and comments, enabling you to track the quality of
IV. Live Help
The live help button can be embedded into customer business flows and allows clients to initiate a session from any place (page-in widget, iframe, link or ad, etc.)
Main functionality:
− Open a session in an iframe on the same window
− Customize the Live Help button
− Support a custom customer logo
− Support selfie validation in the widget mode
− Default activity like Fullscreen text chat or audio/video
− Support a call to a specific agent from live help SDK
− Support to join appointment via live help in iframe
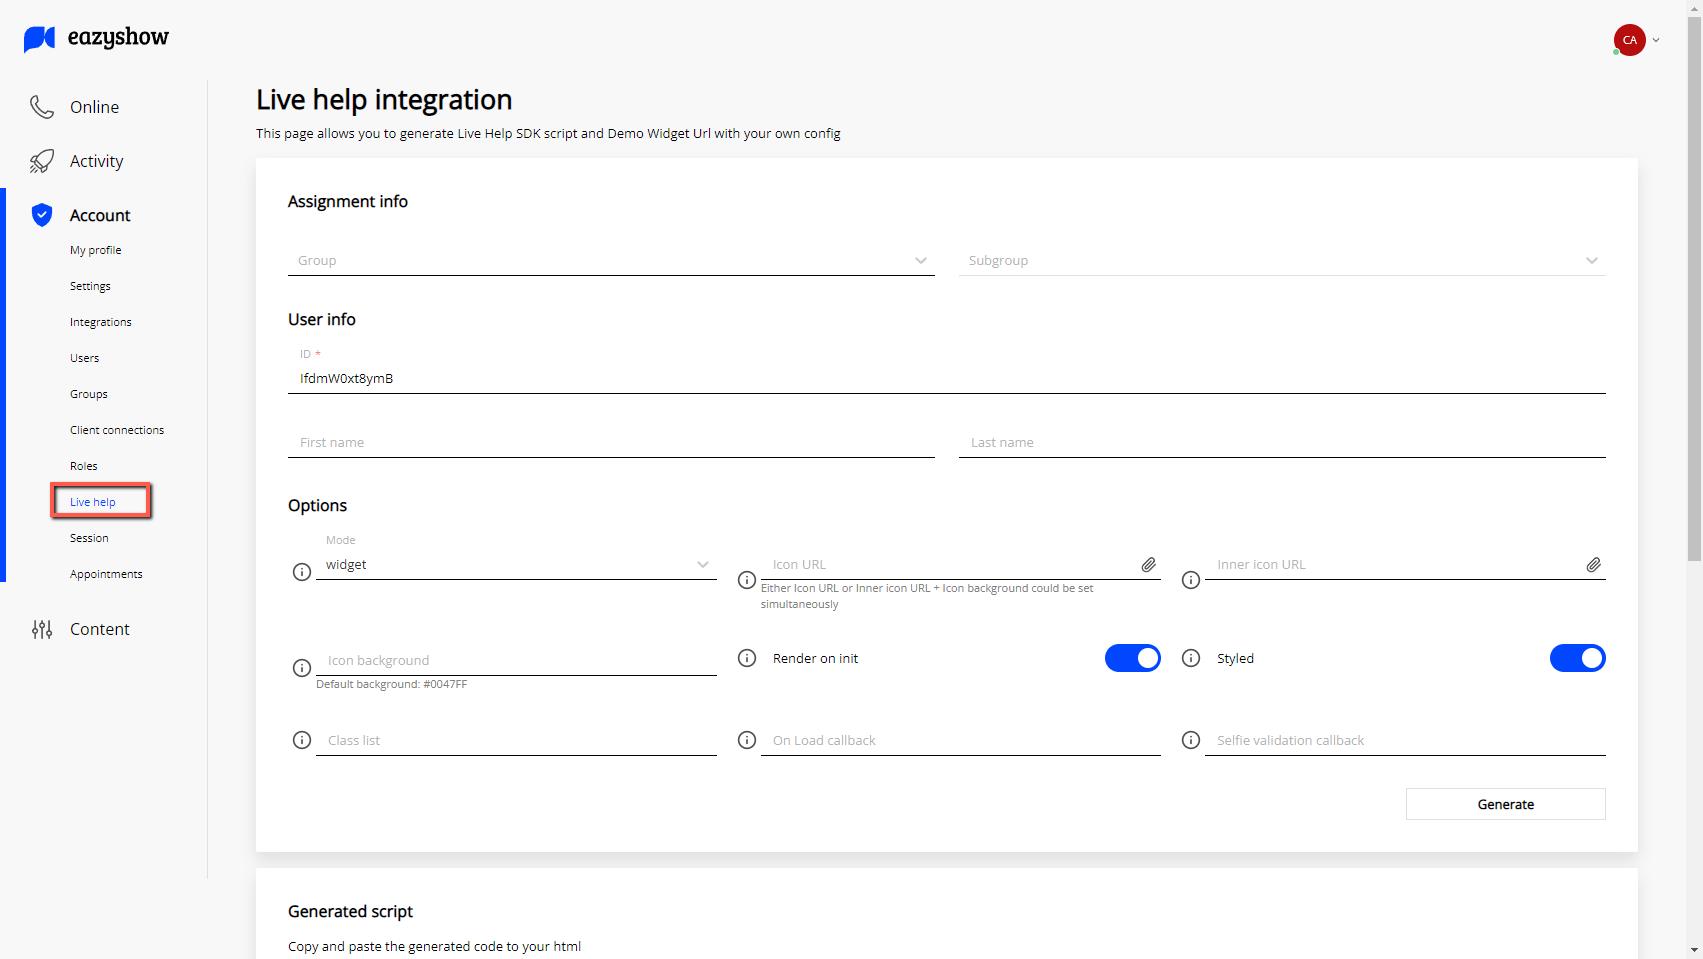
To make Live Help work, follow the steps below:
1. Go to the Account tab
2. Click on the Live Help button
3. Fill in the required fields
4. Customize the button
5. Once steps 1-4 are complete, the platform will automatically generate a script. Just copy the script and insert it into the header of your website. You will be able to see the “live help” button on your website.
For any additional questions, please contact us at support@eazyshow.com